こんにちは。たいら(@tairaengineer2)です。
転職を繰り返し現在4社経験している、11年目エンジニアです。
この記事では、 Ruby on RailsでURLを生成するurl_forメソッドについて
- url_forメソッドとは
- url_forメソッドを使ったサンプルプログラム
と、この記事で丁寧に解説していきます。
前提条件:実行環境について
実行環境は以下の通りです。
| OS | Windows10 |
|---|---|
| Rubyのバージョン | 2.6.6 |
| Ruby on Railsのバージョン | 6.0.3.5 |
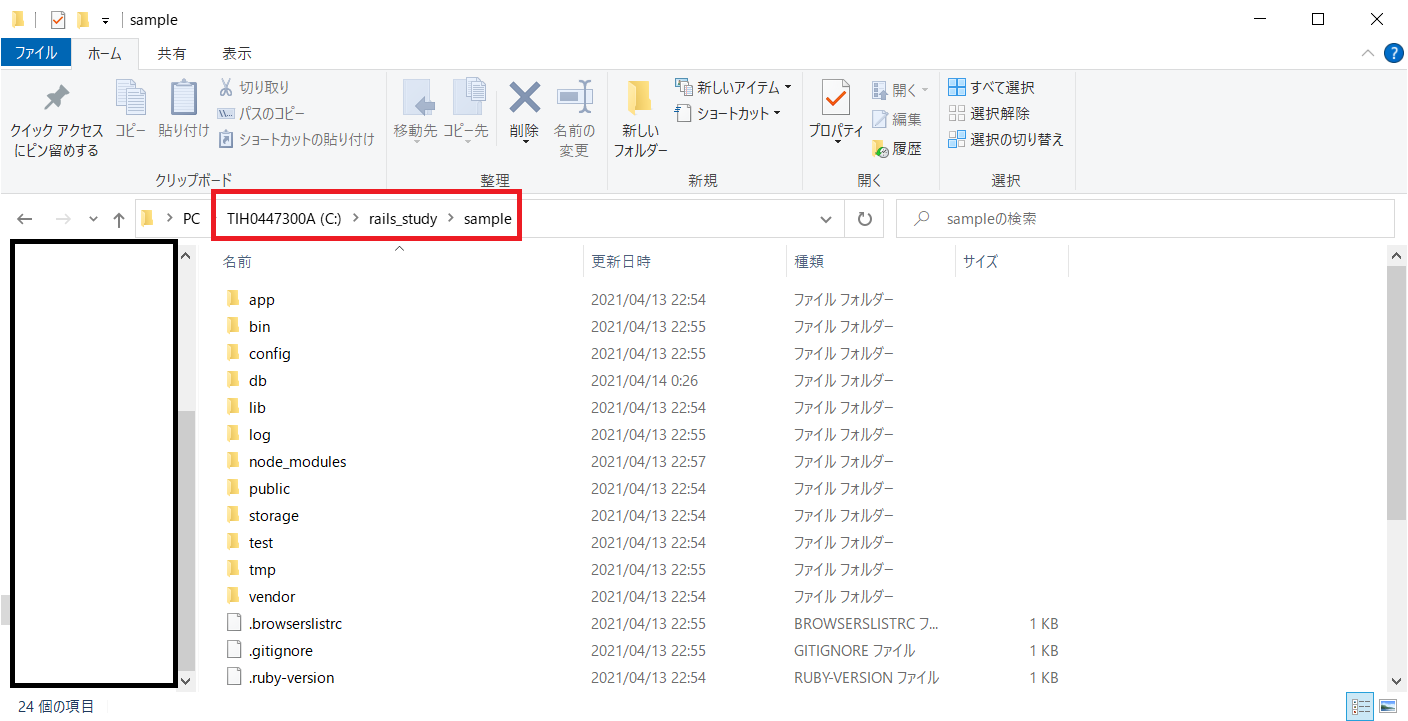
この記事ではRuby on Railsのプロジェクトは
C:\rails_study\sample
に作成しています。

Ruby on Railsのアプリケーションを新規作成するやり方はこちらの記事をご参考ください。
url_forメソッドとは
url_forメソッドとは、指定されたオプションに対応するURLを生成して返すメソッドです。
使い方サンプルは以下です。
|
1 |
url_for(【オプション】) |
指定できるオプションは表にまとめました。
| オプション | 説明 |
|---|---|
| controller | コントローラー名を指定 |
| action | アクション名を指定 |
| only_path | プロトコル、ホスト名、ポートを省略するかどうかのオプション。 trueまたはfalseを指定、返す値は以下。
デフォルトは
|
| trailing_slash | URLの末尾にスラッシュ(/)を追加するかどうかのオプション。 trueまたはfalseを指定、返す値は以下。
デフォルトはfalse |
| anchor | アンカーを指定 |
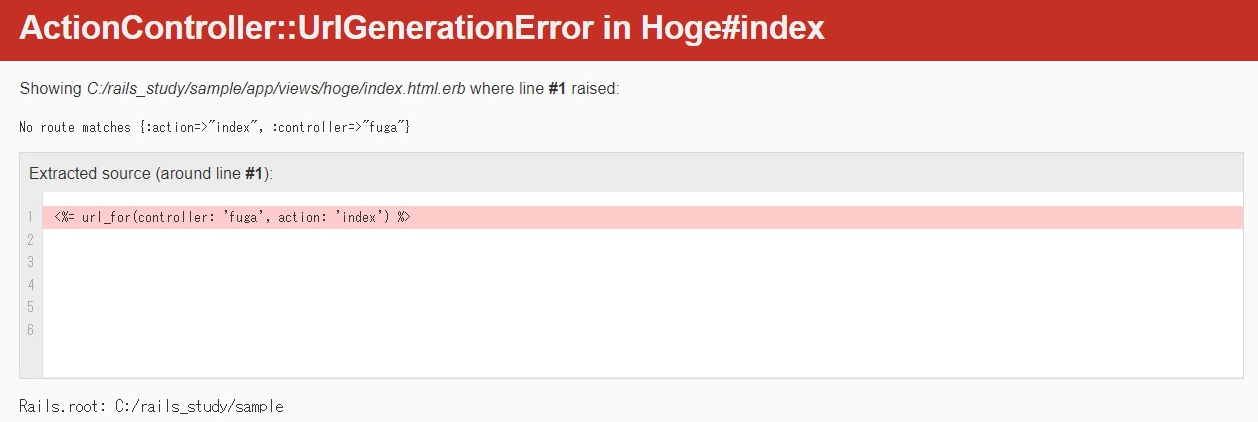
注意点として、指定するコントローラーやアクションはroutes.rbで定義されている、つまりルーティングされている必要があります。
されていないものをオプションで指定して実行すると

|
1 2 3 |
ActionController::UrlGenerationError in Hoge#index Showing C:/rails_study/sample/app/views/hoge/index.html.erb where line #1 raised: No route matches {:action=>"index", :controller=>"fuga"} |
と例外が発生します。
では、次の章で実際に使ってみます。
url_forメソッドを解説するプログラムの概要
url_forメソッドを解説するプログラムは、
- コントローラー
- ビュー
- config\routes.rb
3つを使います。
コントローラーの新規作成時にアクションとビューを作成できるやり方は、以下の記事をご参考ください。
コントローラーは名前を【hoge_controller】とし、
sample\app\controllers\hoge_controller.rb
に格納しています。
- オプション指定なし
- Controllerとaction指定
- only_path指定(true)
- only_path指定(false)
- trailing_slash指定
- anchor指定
の6パターンでurl_forメソッドでオプション指定してURLを生成、それらをビューに渡します。
ビューは名前を【index.html.erb】とし、
sample\app\views\hoge\index.html.erb
に格納しています。
ビューでもコントローラーと同じ6パターンでurl_forメソッドでオプション指定してURLを生成します。
コントローラー側で作成したURLとビューで作成したURLをそれぞれ表示させ確認します。
コントローラからビューに値を渡して表示させるやり方は、以下の記事をご参考ください。
コントローラーのサンプルプログラム
|
1 2 3 4 5 6 7 8 9 10 11 12 13 |
class HogeController < ApplicationController def index @no_option = url_for() @controller_action = url_for(controller: 'hoge', action: 'detail') @only_path_true = url_for(only_path: true) @only_path_false = url_for(only_path: false) @trailing_slash = url_for(trailing_slash: true) @anchor = url_for(anchor: 'fugafuga') end def detail end end |
ビューのサンプルプログラム
|
1 2 3 4 5 6 7 8 9 10 11 12 13 14 15 16 17 18 19 20 21 22 23 24 25 26 27 28 29 30 31 32 33 34 35 36 37 38 39 40 41 42 43 |
<h1>url_forメソッドサンプル</h1> <table rules="all" border="1"> <thead> <tr> <th width="20%">操作</th> <th width="40%">ビューで指定</th> <th width="40%">コントローラーで指定</th> </tr> </thead> <tbody> <tr> <td>オプション指定なし</td> <td><%= url_for() %></td> <td><%= @no_option %></td> </tr> <tr> <td>Controllerとaction指定</td> <td><%= url_for(controller: 'hoge', action: 'detail') %></td> <td><%= @controller_action %></td> </tr> <tr> <td>only_path指定(true)</td> <td><%= url_for(only_path: true) %></td> <td><%= @only_path_true %></td> </tr> <tr> <td>only_path指定(false)</td> <td><%= url_for(only_path: false) %></td> <td><%= @only_path_false %></td> </tr> <tr> <td>trailing_slash指定</td> <td><%= url_for(trailing_slash: true) %></td> <td><%= @trailing_slash %></td> </tr> <tr> <td>anchor指定</td> <td><%= url_for(anchor: 'hogehoge') %></td> <td><%= @anchor %></td> </tr> </tbody> </table> |
config\routes.rbのサンプルプログラム
|
1 2 3 4 |
Rails.application.routes.draw do get 'hoge/detail' get 'hoge/index' end |
実行して確認
コントローラから値を取得して画面に表示することができるのかを実行して確認します。
Ruby on Railsでサーバーを立ち上げるコマンドは
|
1 |
rails server |
です。
サーバーを立ち上げるコマンドの詳細な説明は、こちらの記事をご参考ください。
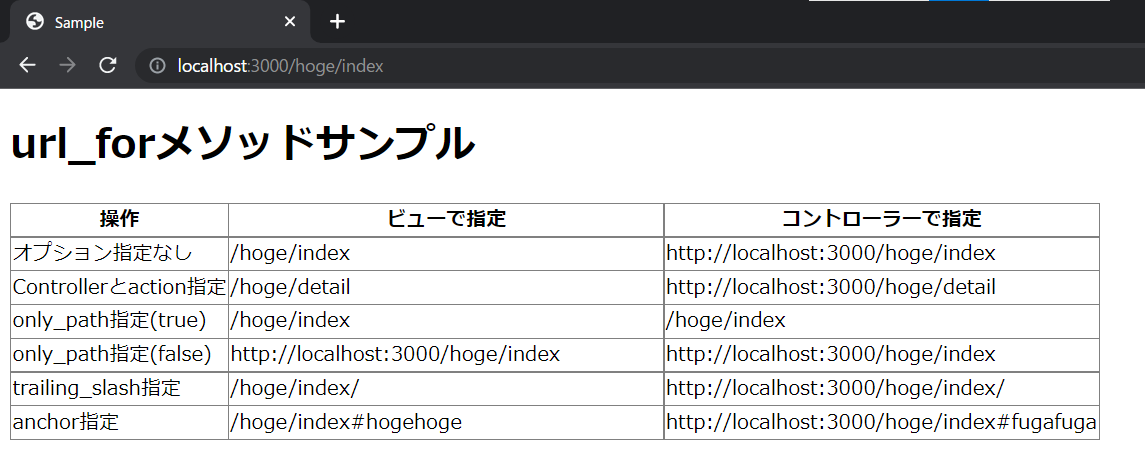
【http://localhost:3000/hoge/index】のURLにアクセスすると、オプションで指定した通りのURLが生成できていることが確認できました。

まとめ:url_forメソッドを使ってみよう
以上がRuby on Railsのurl_forメソッドの解説でした!
あなたのご参考になったのなら、とても嬉しいです(*´▽`*)
ではでは~(・ω・)ノシ

コメント